making a baby shower invitation

It certainly feels like baby season at the moment. Lots of my friends are gearing themselves up for the arrival of their sweet little bundles which can mean only one thing- bring on the baby showers!

I loved being involved in my friend Mandy's shower and had so much fun making all kinds of baby shower decorations. So when my lovely friend Carla needed some help organising an invitation for her shower, I happily offered to try and make something using my fledgling photshop skills. She wanted to email the invitations which meant I only had to come up with something that would look good as an attached jpeg image.

Here is how it turned out: 


 baby shower invitation design

To get started, I first went to work looking for some cute baby themed clip art. Through Etsy I found an adorable digital clip art set called Lime Green Baby Fairy by little fairyland for just $5 US. So cute! There is so much to choose from on Etsy and you can buy the images so cheaply. There's no way I could draw things like this so I'm happy to pay for someone elses talents! (I know my limitations...)

With the clip art as the base for the design, I decided I'd like some sky and clouds to represent the background of the 'washing line'. For this I used a scalloped edge brush and a cartoon cloud brush. I love polka dots so I made a  dotty design using a tutorial from pugly pixel for the background of the text. Then I just added a couple more of the clip art images for some detail and added a border.

I am pretty happy with how it turned out for a first go. My friend liked it too which is great news! I think I'll try to use Photoshop to make her a banner to hang up at the shower too. We'll see.

I have really been loving experimenting with Photoshop and recommend it for tech savvy creative types. The possibilities are endless. I'd quite like to have a go at Illustrator too but I think that's a bit of a step up.

What should I make next?

xx

tutorial: sew a tote bag

I haven't had a chance to write up a sewing tutorial for a long time, and even though there are probably a thousand different tutes for making a tote bag in crafty cyberland, I decided to throw my own version in anyway.

Blogging this particular tutorial is extra special for me for the following reasons:
  • I photographed each step with my new Lumix camera (thanks dad and Karl!)
  • I processed the photos myself (with some help from my cleverer half of course!)
  • I made this bag using my favourite Kokka ballerina fabric for my friend Kylie who owns her own ballet school. She is super supportive of me and my sewing.  
Here is a picture of my finished tote:
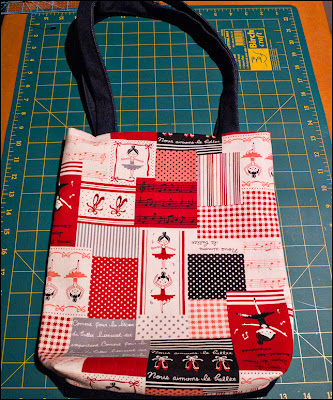

Ballerina fabric tote bag


Warning: This tutorial has LOTS of photos!
Materials:
  • Main fabric (1 yard/1 metre will cover it)
  • Lining Fabric (1/2 a yard/metre)
  • Interfacing (optional)


Step 1: cut out your fabric
From your main fabric (outer pieces), cut two rectangles, 15 inches long x 12 inches wide (37.5cm x 30 cm).
For my tote, I used one piece of the Kokka Ballerina fabric for the front and a piece of denim for the back.
From your lining fabric, cut two rectangles, 15 inches long x 12 inches wide (37.5cm x 30 cm)
From your outer fabric (I used my denim piece) cut two strips, 26 inches x 5 inches (65cm x 12.5cm) for your handles. (you might like to play around with a length that suits you) 
Optional: From your interfacing, cut out two rectangles 13 inches by 10 inches (32.5cm x 25cm). If you're wondering why the interfacing pieces are smaller, it's to avoid having bulk in your seams. ahhhh.....
Iron your interfacing onto your main fabric pieces with a dry iron (no steam) and a damp cloth. Allow to cool before moving.
Here's what you should have:
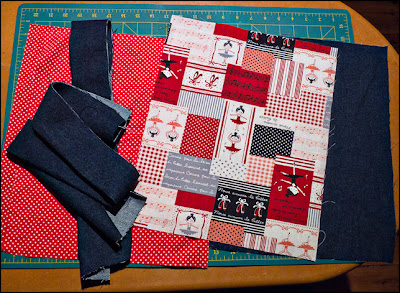
cut out your fabric, iron on interfacing


Step 2: make your straps

 Take your strap piece and fold down the middle length ways. Give it a little press and unfold it again so you can see where the middle sits.

 
Fold one long edge into the middle and press.
Fold the other long edge into the middle and press.
Fold the whole thing in half, trapping the raw edges inside. Press.
Pin along the long edge and stitch down each long end, close to the edges. (it's hard to see the stitches in this photo.) Repeat with the other strap piece.
Step 3: stitch outer pieces together
Place your two outer pieces right sides together and pin around the two long ends and one short end, leaving the top open.
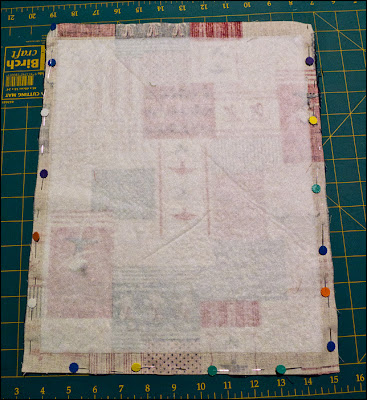

pin your main fabric pieces right sides together

Stitch around the three sides using your usual seam allowance. Press the seam to shrink the stitches and trim the corners and sides. Don't turn it the right side out just yet.
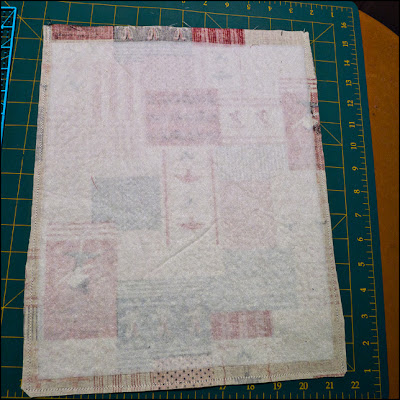

press and trim seams

Step 4: stitch lining pieces together
Place your lining pieces right sides together and pin around three sides. Leave a gap at the bottom on the lining pieces so you can turn your bag the right way out later.
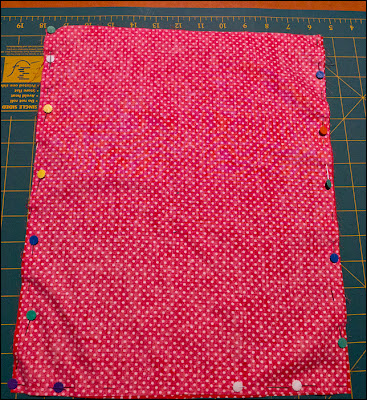
  

Pin around three sides leaving a gap for turning the bag later

Stitch around all three sides leaving a gap at the bottom.
Hint: At the start of the gap make sure you back stitch to strengthen it.
Press the seam to shrink the stitches and trim the corners and sides. 
Step 5: box your corners
This step is optional, but it gives your tote a base making it look and sit nicer when it's filled.
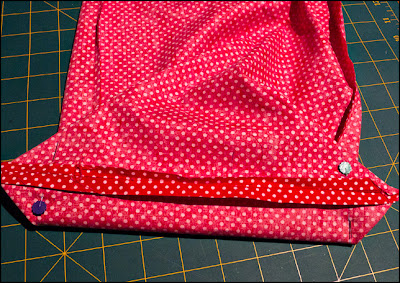
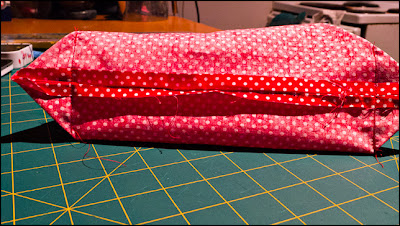
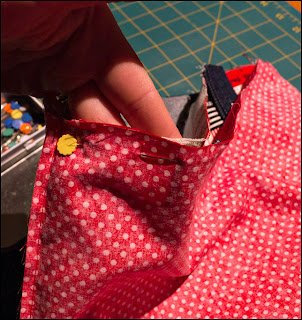
Take your outer bag piece (still inside out) and pinch one bottom corner. Use your fingers to line up the bottom seam with the side seam and make a triangle as pictured.
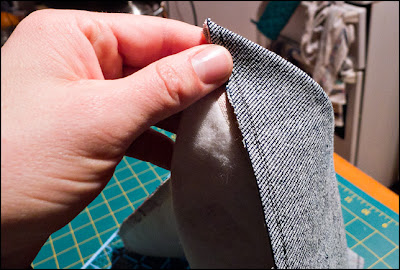

pinch bag corner.
Lay your bag corner flat on your mat or table and use a ruler to meaure 1.5 inches (about 3.5 cm) from the tip of the triangle.
 

measure 1.5 inches

Draw a line at the base of the triangle using the ruler, 1.5 inches from the tip.

Stitch along the line. I did this twice for strength.

Repeat with the other corner, then trim both triangles to remove the bulk.
  
At this point I straightened it out to test the boxy bottom of the bag. Ooooh, worked well this time! (It doesn't always)
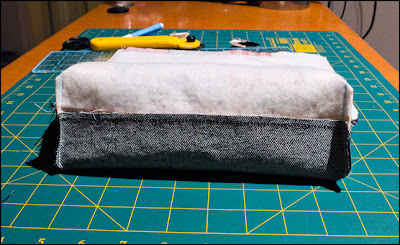

admire your boxed bag bottom

Repeat this process with your lining piece. 
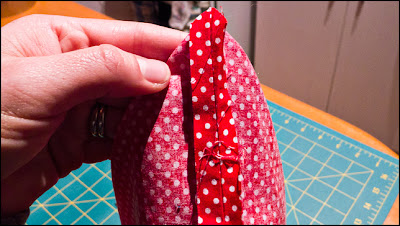
Pinch corners

measure and pin


stitch your corners then trim the bulk

Turn both of your bag pieces right side out and press the seams nicely. Take care when pressing the boxed bottom of your bag (I find this part challenging and should probably seek some advice on this).

Step 6: Pin on the straps

Take both of your strap pieces and double check they are the same length.

Take one of your strap pieces and work out where you would like your bag handles to go. I measured 2 inches (5cm) in from each of the sides and pinned. Make sure your pins are low (below the seam allowance) so they don't get in the way when you're stitching the top of the bag.
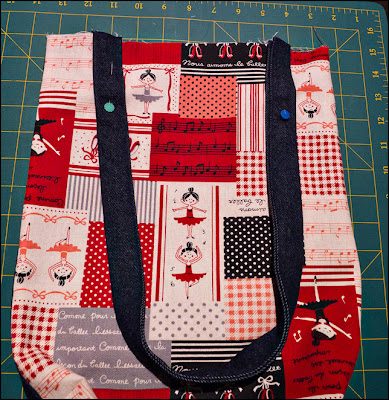
  

Pin your strap to the right side of your bag front

Repeat this process with the other bag handle, lining it up with the one you just pinned. Check the bag loops are even on both sides.
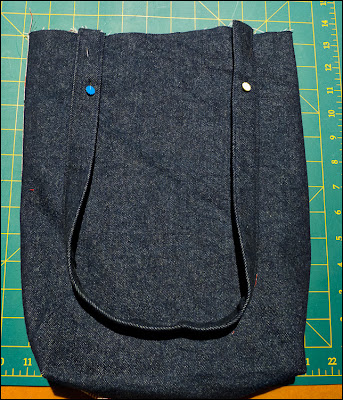
 
  
Pin your strap to the right side of your bag back

Step 7: Assemble and stitch your bag

Turn your lining piece inside out. 
Put your main bag piece inside your lining piece and line up both pieces at the top. You should have the right sides of the main and lining fabrics facing.
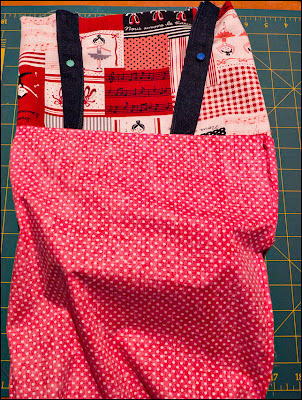
 
put your outer bag piece inside the lining and line up at the top

 Pin around the top edge carefully.
Pin the top
Stitch around the top of the bag twice. I went forward and backward over the straps a couple of times to give it extra strength there.
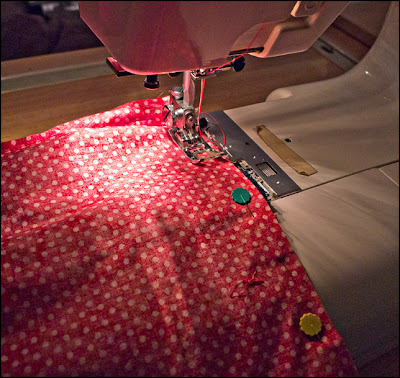
Double stitch around the top

 Trim the excess fabric from the straps and any other loose threads.
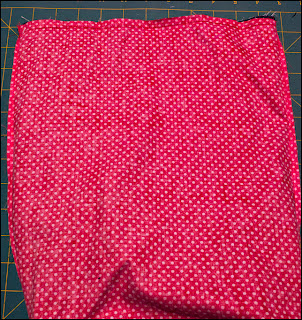
  
trim
Find the hole in the bottom of the lining and pull your main bag piece through.
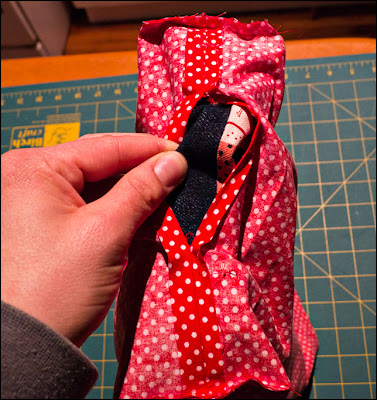
   

turn your bag the right way out

Keep pulling!
  
  
With your bag completely turned, give it a little press around the top.


Slip stitch closed the hole in the lining and pop it into the main bag piece. Give the whole thing a nice press. 
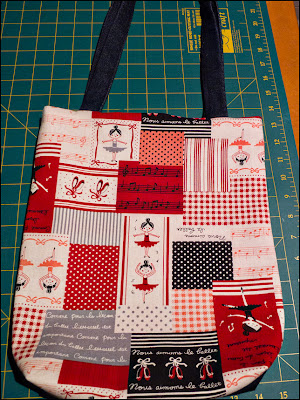

admire your finished bag.
 Finished!

In the completed picture, the bag looks quite rounded at the bottom. This becomes more square looking when the tote has some things in it. I had some trouble photgraphing it at it's best so I'll have to work on that.

Another option you might like to include is a snap or a loop and button to keep the tote closed.

Here is a close up of the kokka ballerina fabric I used. It's so beautiful and the patchwork quality lends itself well to all kinds of projects. I'm finding it harder and harder to track this fabric down these days!
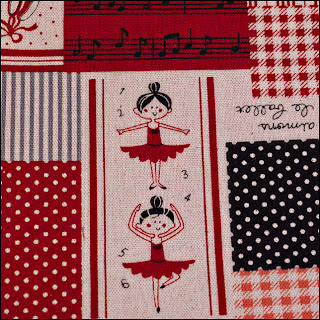

favourite fabric

Thank you for having a look at my tutorial, I hope you find it useful. It was certainly fun to make and photograph.

xx

Catch a Glimpse Button


Inspiration needed today!

I am feeling a little sad today because I have just finished reading an article I found on Handmadeology called 5 real dangers of quitting your day job by Jacqueline of Jacqueline Jewelry.

Basically, Jacqueline outlines the reality of working full time on your online business and highlights the many pitfalls of trying to do this. Phrases from the article that have contributed to me feeling like my little craft business dream is a total waste of time include: 'Earnings are not consistent' 'Money is not made by perusing. It is made by doing something concrete and having people buy something' 'You do not hear about the millions who failed' and finally 'Depression and poor motivation are serious issues with quitting your day job'.

Yipppeeee!!! Dire or what? I can only laugh really and take it as the reality check most people need when thinking about chucking it all in for the idealistic dream of being a full time, financially stable creative artist. I thanked Jacqueline for the healthy dose of reailty because I will take on board what she has said. I have being saying for a while now that it's best for me not to have high expectations and put pressure on myself, and to just focus on the part which I love the most- making and giving. That's all I can do I guess!

Now- to cheer myself up I'm going to delve into Pinterest and share some nice things with you.


lovely Kidson fabric

cutie Animal Alphabet by Paola Zakimi

super cute baby fox- Graham Ten
naw. Kitties always cheer me up!
beautiful Salzburg, Vienna. Lovely memories. Sunsufer tumblr
a lovely walk would be nice. A cottage in the woods tumblr

inspiring words. :)

Ok, I'm feeling much better now!

What cheers you up?

xx

My first guest post


A few weeks ago I was contacted by the lovely Nikki from Nature's Heirloom. She asked me if I would like to do a guest post for her to fill some space while she had her baby. I was so excited!

Nikki asked if I would share my tutorial for making a travel wipes and diaper bag to stay in with the baby theme. I sent it to her using the wonders of html and email (she explained it well for my novice blogger brain!) and she has now posted it on her blog. She also said some lovely things about my blog which was so nice. :) Nikki's blog is full of inspiring tutorials and links to projects for all kinds of thngs. I recommend stopping by and checking it out.

Check out my first guest post here if you like! It made my day. :)


I'd really love someone to do a crafty/sewing related guest post on my blog. Please feel free to get in touch if you're interested!

xx

more fun with photoshop tutorials

Recently I have discovered Photoshop as a fun tool for designing and enhancing images. So far I have really enjoyed using it and learning new things. I am hoping to gain enough skills in using Photoshop to make my own branding and perhaps my own cards, gift tags and invitations. We'll see how far I get with it!

Yesterday I followed a fun tutorial from pshero for making frayed denim patches with stitches. I thought this would be a handy one to do as I think I'd like to incorporate stitches into my logo to suggest a 'handmade' sort of feel. Also, I love using denim in my projects because it's so versatile and goes with every colour. It also gives the backs of purses and bags some weight and stability.

Here is how it turned out:
Today, I decided to have another go at using the denim patch idea combined with a scalloped circle I downloaded from Pugly Pixel as part of my premium membership (costs only $5 for heaps of awesome things!).
I fiddled around with a few other things and came up with this:


While I wouldn't use this as a logo for Elegantpaws Designs, I quite like the scalloped circle with holes in it like a doily. I also like the stitching idea too.  Maybe I could try something like this but with polka dots... the possibilities are endless!

Since my skills are clearly fledgling though I think it's going to take some work to get to a place where I can make something that will a) suit my handmade things and b) live up to my expectations! I may never get there but i'm having fun, and if it means I have some ideas to give to a professional logo designer to work with (and make 100 times better) then that's a win too.

xx

finding success later in life.

Yesterday I read an inspiring article about finding success later in life written by Candice Chung. The article discusses the idea that despite occurances throughout history of genius presenting itself at a young age (think Mozart, Picasso etc) it isn't always the case, and that there isn't actually a link between age and peak creativity.

This spells hope for me and other 30 something 'late bloomers' as Candice describes. The article assures us that perhaps like Vivienne Westwood (started working full time in fashion at 30) and Jane Austin (published her first book at 35) our best work may be ahead of us.

This gave me a huge amount of reassurance as it really does seem like everyone glorified in popular culture and media at the moment are strapping lads and lasses in their late teens and early to mid 20s. Candice says the belief that you 'either have to excel early or not at all' doesn't actually exist, and it's just our assumption based on what we've seen in history. Some of those amazing artists, composers and directors seem to hit their stride at an age where some of us are still grappling with 'Will this 8th glass of beer/wine/vodka be a good or a bad idea?'

For me, I'm just grateful I discovered my passion for sewing at all. For a while there I felt there was a big gaping hole in my creative life and I tried many different things to try and fill it. Sewing and crafts have definitely been the best fit for me and I look forward to seeing where this passion will take me. Fun places I imagine.
 
One of the best things I took from the article was this wonderful quote from Candace that I would like to print and read regularly. I think they are words to craft by so hopefully you like them too:


I'd love to hear your thoughts!

xx

Discovering Photoshop

Over the last couple of weeks I have started to think about branding for my future handmade business. I realised that in order to have a professional looking market stall I would probably need to have tags on my bags and purses, a poster or sign to put up, some business cards to hand out and perhaps somewhere for people to go if they would like to shop online.

To tie all this together I decided I needed a logo and some theming ideas. I had a good think about the kinds of things that represent me, my loves and my crafts and came up with some broad ideas to incorporate in some way, things like polka dots, cats, cute/kawaii things, vintage etc.

I looked into having a logo designed by a professional and unfortunately it was a little out of my price range at this point in time, so I decided to look into making one myself.

Enter the major epiphany that lo and behold, at my very fingertips resides a computer program to meet all the needs of an amaetur logo designer- Photoshop. My husband uses it almost daily for his photography and it occured to me if he can have multiple layers for photos, surely I could use it for patterns frames and text?

My ignorance of the power of Photoshop became apparent when I discovered an amazing website called Pugly Pixel. It's creator Katrina has to be one of the most generous, talented and quirky artists I have come across and her website hosts a huge collection of free (and premium) files of digital backgrounds, papers, tapes, ribbons and more for people to use on their blogs, websites and for arts and crafts. Amazing!

Katrina has also put together a series of tutorials showing you how to make your own backgrounds, borders and patterns using Photoshop. I had no previous experience using Photoshop and was able to follow the tutorials really easily. I'd recommend them for anyone who would like to make their own digital stationary to pretty up their blogs and websites. Fun!

After fiddling around with a few techniques I put some of them together to make something resembling a little business card. My husband fixed it up for me, flattened it and saved it as a jpeg so I can share it with you here:

first Photoshop baby
I don't think it is something I would use, but it was definitely fun to make and to play around with. Not bad for a first go! I'm pretty excited about learning some new skills and I think it could open up a whole range of possibilities.

I can't wait to learn more!
xx

attaching a flap to a zippered purse

I love making little zippered purses and tend to make more of them than anything else because they are pretty easy and the variations are endless.

I have always liked those cute little clutches which have a flap covering the zipped section and thought I would have a go at making one. I had a bit of a think about it and decided there were two ways I could try to attach the flap. I could either sew it as a layer attached to the zipper, or sew the completed flap to the outside fabric.

The first attempt I made was for a vintage style clutch. here is a picture so you can visualise the process a little better:

Outside of clutch

inside of clutch

To attach the flap in this example, I sewed it to the zipper tape at the same time I sewed the lining and outside fabric to it, so it's caught between the layers.


I was fairly happy with how it turned out but it was a little fiddly to put together as the parts didn't line up perfectly (self devised pattern = no guarentees). Overall I love this little clutch and would definitely use this method again.

Next time I made a little zipped coin purse I decided to try a different approach- to make the flap for the purse and attach it to the top of the back fabric piece before sewing it to the zipper tape. In some ways this was easier as you could attach the flap to the back piece before sewing it to the zipper tape and there was less bulk in the zipper tape, but the flap doesn't sit perfectly unless the snap is there to hold it in place.

Here are some pics of the purse for you to see for yourself:

Coin purse using kokka ballerina fabric

back of coin purse

inside

While this method worked quite well, I think the other way is more functional and I'd be more likely to use it again in the future. 

I think I have one more method to try which I'll write about when I get around to it. In the meantime, if you have any suggestions I'd love to hear about it!

xx

Linking up here!


Join  us Saturdays at tatertotsandjello.com for the weekend wrap 
 up           party!


Related Posts Plugin for WordPress, Blogger...